The Irresistible No-Bake Oreo Sensation is a culinary creation that epitomizes the art of effortless indulgence.
With its harmonious blend of creamy textures and crunchy layers, this dessert transcends the typical offerings found in many kitchens.
The preparation begins with a simple yet effective Oreo crust, followed by a luscious cream cheese mixture and the choice of pudding that can elevate the experience.
As we explore the nuances of its components and techniques, one may wonder how to achieve the perfect balance of flavors and presentation that truly defines this dessert’s allure.
Oreo Crust Preparation
To create a delectable Oreo crust, begin by finely crushing Oreo cookies using a food processor, which guarantees a uniform texture that is essential for a sturdy base.
The classic Oreo is a favorite, but exploring various Oreo cookie flavors—such as mint or peanut butter—can enhance the crust’s complexity and appeal.
Once crushed, combine the Oreo crumbs with melted butter, ensuring a cohesive mixture that binds well. Press this mixture firmly into the bottom of a 9×13 inch baking pan, creating a solid foundation for your dessert.
Allow the crust to set for a few minutes before proceeding.
Additionally, consider experimenting with crust variations by incorporating graham cracker crumbs or adding spices for a unique twist, elevating your no-bake creation to new heights.
Cream Cheese Mixture
When preparing the cream cheese mixture, it’s crucial to bring the cream cheese to room temperature, as this step guarantees a smooth and creamy consistency that is necessary for achieving the desired texture in your dessert.
Utilizing effective mixing techniques can elevate your no-bake creation. Consider these innovative approaches:
- Start with plain cream cheese for a classic flavor.
- Experiment with cream cheese variations, such as flavored or whipped options.
- Blend until completely smooth before incorporating other ingredients.
- Avoid lumps by mixing thoroughly, especially if the cream cheese is cool.
- Add a touch of sweetness to enhance the overall flavor profile.
These strategies guarantee a delightful cream cheese mixture that complements your Oreo sensation wonderfully, creating an irresistibly rich dessert experience.
Pudding Types
The choice of pudding plays a significant role in shaping the overall texture and flavor of your no-bake Oreo sensation.
Instant pudding, known for its quick preparation, provides a lighter, airier texture, effortlessly mixing with milk to create a creamy base.
In contrast, cooked pudding offers a richer, velvety mouthfeel, enhancing the dessert’s indulgence. This option requires patience, as it must cool completely before incorporation, but the depth of flavor achieved is unparalleled.
Selecting different pudding flavors, such as vanilla, chocolate, or even caramel, introduces unique twists, allowing for a personalized touch.
Freezing and Serving
Preserving the delightful essence of your no-bake Oreo sensation is not only practical but also enhances its appeal for future occasions.
With proper dessert storage techniques, you can enjoy this delectable treat whenever cravings strike. Here are some innovative serving suggestions:
- Freeze the dessert in individual portions for easy access.
- Defrost overnight in the refrigerator to maintain texture.
- Serve chilled with a drizzle of chocolate sauce for added flair.
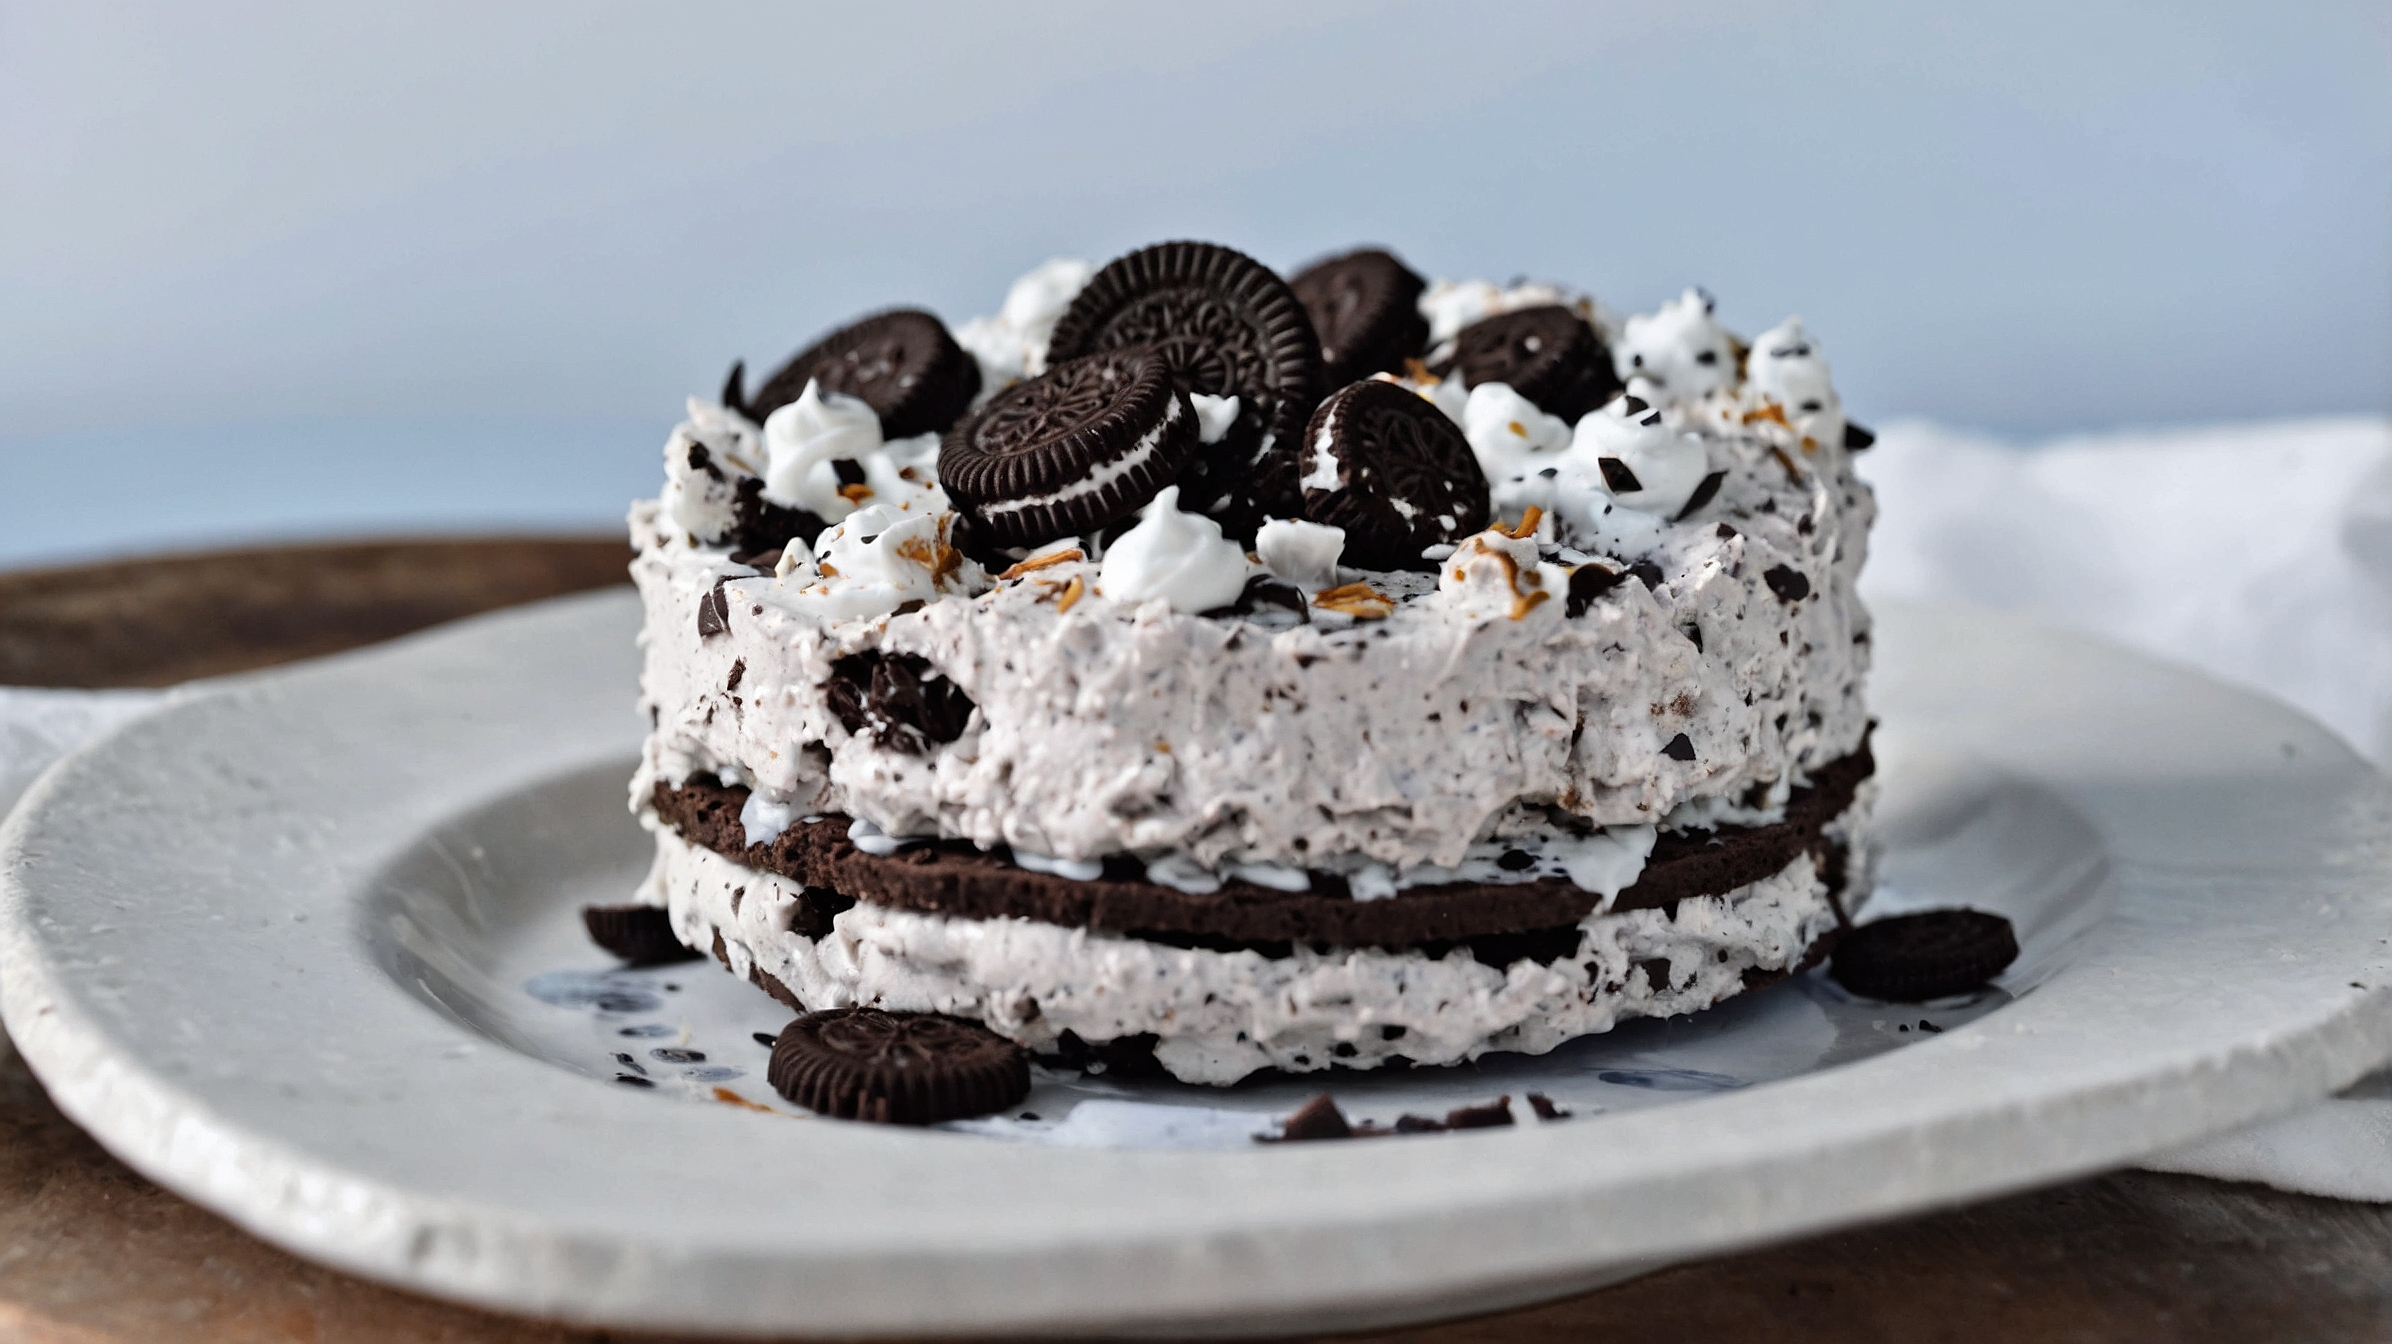
- Garnish with whipped cream and crushed Oreos for visual impact.
- Pair with fresh berries to elevate the flavor profile.
These methods not only guarantee freshness but also allow you to impress guests with minimal effort.
Embrace the convenience of freezing and serving your Oreo sensation, making every gathering a memorable affair.
Essential Kitchen Tools
To successfully whip up your no-bake Oreo sensation, having the right kitchen tools on hand can make all the difference.
A food processor is essential for effortlessly crushing Oreos and blending ingredients into a uniform mixture.
The 9×13 inch pan, preferably with a lid, is perfect for assembling and storing your dessert, ensuring ideal kitchen organization.
A silicone spatula will help you spread mixtures evenly, while a chef’s knife is invaluable for slicing additional toppings with precision.
For those who wish to elevate their presentation, a chocolate shaver can create elegant chocolate garnishes. Regular tool maintenance is vital; keeping your equipment clean and in good condition not only enhances performance but also promotes longevity.
Layering the Ingredients
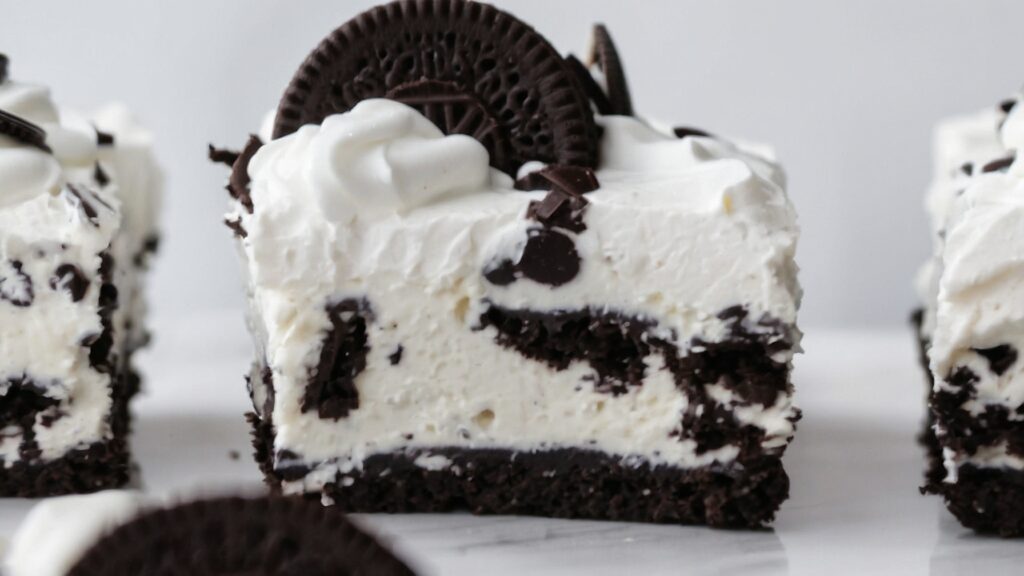
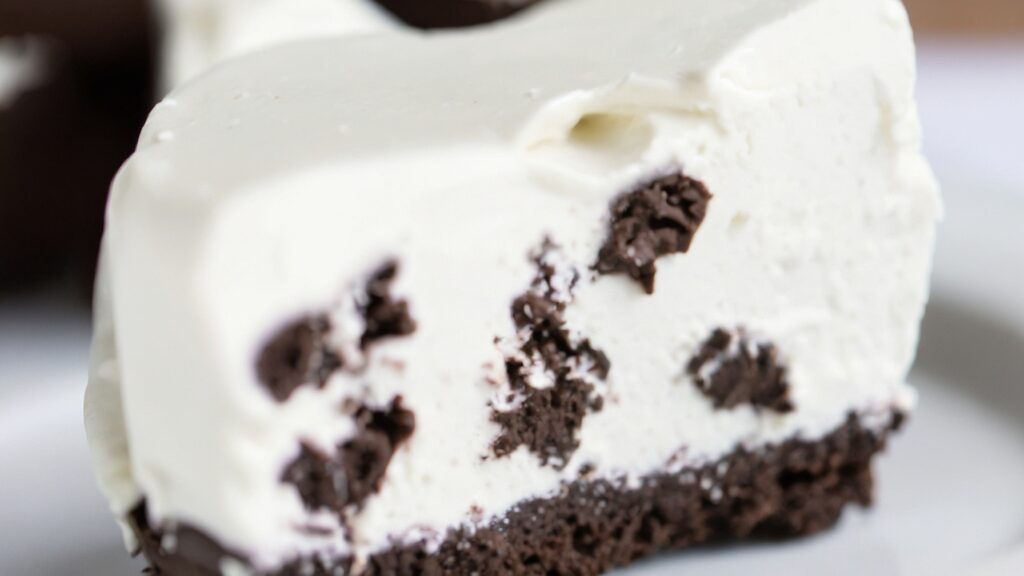
Creating a visually appealing no-bake Oreo sensation involves carefully layering the ingredients to achieve a harmonious blend of flavors and textures.
Employing innovative layering techniques elevates the dessert, making each bite a delightful experience. Consider the following elements when constructing your masterpiece:
- Oreo crust: Provides a crunchy base that complements creamy layers.
- Cream cheese mixture: Introduces a rich, tangy flavor that balances sweetness.
- Pudding layer: Choose between instant or cooked for varied textures.
- Whipped topping: Adds a light, airy finish that enhances presentation.
- Garnishes: Utilize crushed Oreos or chocolate shavings for visual appeal.
These flavor combinations not only enhance taste but also create a stunning layered effect that is sure to impress your guests.
Customizing Your Dessert
Customization is the key to personalizing your no-bake Oreo sensation, allowing you to tailor the dessert to suit your unique tastes and preferences.
Start by exploring flavor variations—consider substituting classic vanilla pudding with chocolate or caramel for an exciting twist. For a fruity touch, incorporate a layer of raspberry or strawberry puree, enhancing both flavor and visual appeal.
Topping suggestions are equally varied; crushed nuts, sprinkles, or fresh fruit can elevate your creation. For chocolate lovers, drizzling with melted dark chocolate or adding chocolate shavings can intensify the experience.
Tips for Perfect Presentation
Elevate the visual appeal of your no-bake Oreo sensation by focusing on thoughtful presentation techniques.
Innovative garnish techniques and creative serving suggestions can transform your dessert into a showstopper. Consider the following ideas:
- Layered jars: Serve in individual glass jars for a chic, layered effect.
- Chocolate shavings: Use a chocolate shaver to create delicate shavings as a garnish.
- Crushed Oreos: Sprinkle crushed Oreos on top for added texture and visual interest.
- Fresh berries: Add a pop of color with fresh raspberries or strawberries as an accent.
- Mint leaves: Incorporate mint leaves for a revitalizing touch and vibrant contrast.
Irresistible No-Bake Oreo Sensation Recipe
Ingredients:
For the Oreo Crust:
- 24 Oreo cookies
- 1/4 cup unsalted butter, melted
For the Cream Cheese Mixture:
- 16 oz cream cheese, room temperature
- 1 cup powdered sugar
- 1 tsp vanilla extract
For the Pudding Layer:
- 1 (3.4 oz) package instant vanilla pudding mix
- 1 1/2 cups cold milk
For the Topping:
- 8 oz whipped topping, thawed
- 6 Oreo cookies, crushed (for garnish)
Instructions:
- Prepare the Oreo Crust:
- Crush Oreo cookies in a food processor until finely ground.
- Mix crushed Oreos with melted butter.
- Press mixture firmly into the bottom of a 9×13 inch pan.
- Refrigerate while preparing other layers.
- Make the Cream Cheese Mixture:
- Beat room temperature cream cheese until smooth.
- Add powdered sugar and vanilla extract, mix until well combined.
- Spread evenly over the Oreo crust.
- Prepare the Pudding Layer:
- Whisk instant pudding mix with cold milk until it starts to thicken.
- Pour over the cream cheese layer and spread evenly.
- Add the Topping:
- Spread whipped topping over the pudding layer.
- Sprinkle crushed Oreos on top for garnish.
- Chill and Serve:
- Refrigerate for at least 4 hours or overnight before serving.
- Cut into squares and enjoy!
Tips for Perfect Presentation:
- Serve in individual glass jars for a layered effect.
- Use a chocolate shaver to create delicate chocolate shavings as a garnish.
- Add fresh berries or mint leaves for a pop of color.
Customization Ideas:
- Try different Oreo flavors for the crust (e.g., mint, peanut butter).
- Experiment with pudding flavors like chocolate or caramel.
- Add a layer of fruit puree for a fruity twist.